
Creating New Forms CDP+SFMC
INTRODUCTION
To create a new layout of the form there’s two ways we can go:
- Duplicating a form (No need to involve a developer)
- Creating a new one from scratch (We recommend you to involve a developer)
Creating the Layout of the Forms: Duplicating
- To create a new formulary copying a template from another existent form, access (/admin/structure/webform) and choose a form(1) that you want to use as a template. Than, click the arrow at the side of the button "Build" and choose "Duplicate"(2);

- Inside de duplication modal, inform:
- Title(1), that will identify your new form;
- The administrative description(2) (which is optional), that will provide the objective of the form that you are creating;
- After that, click the "Save" button.

- After clicking "Save", the new form will be exhibited and you can edit/reorganize the fields.
About form fields and CDP
On Da Vinci, the fields need attention when your are building your form, in special when you are setting the field key:
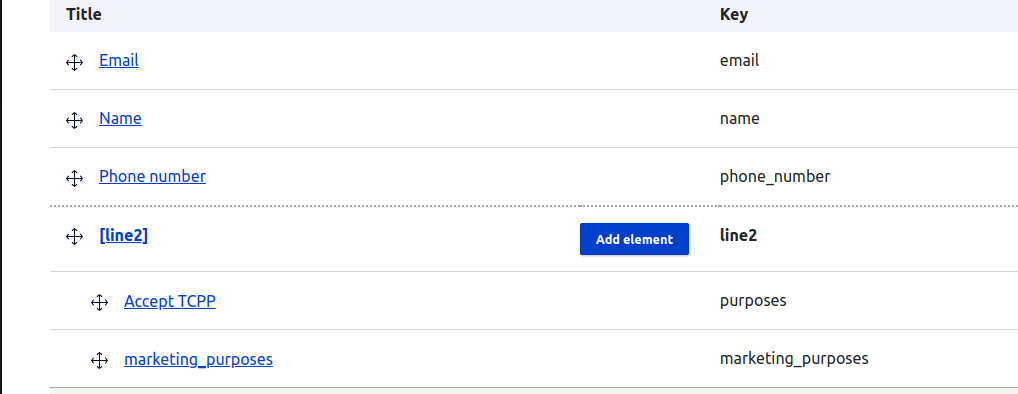
Let's see the considerations:
- If you are using a Date field type, the key should be "dateofbirth";
- For all forms that you want to track data you should use the field "checkboxes" type for the Accept TCPP and Marketing, these should have the respective keys: "purposes", and "marketing purposes";
- For all other fields you can follow the key name examples on the image above or in other webform structure;
- Note: you don't need to build your key as "abi_name", or "abi_email", this "abi_" markation is placed by the CDP module integration;
About checkboxes fields (purposes and marketing purposes)
These fields could be referenced by a token, these token are important to bring data from other part of system called "site settings". There, you are able to add different messages to your purpose and marketing purpose fields occurs your language.
In the path Content > Site Settings, look for "Newsletter Consent".

Click on "Create Setting":
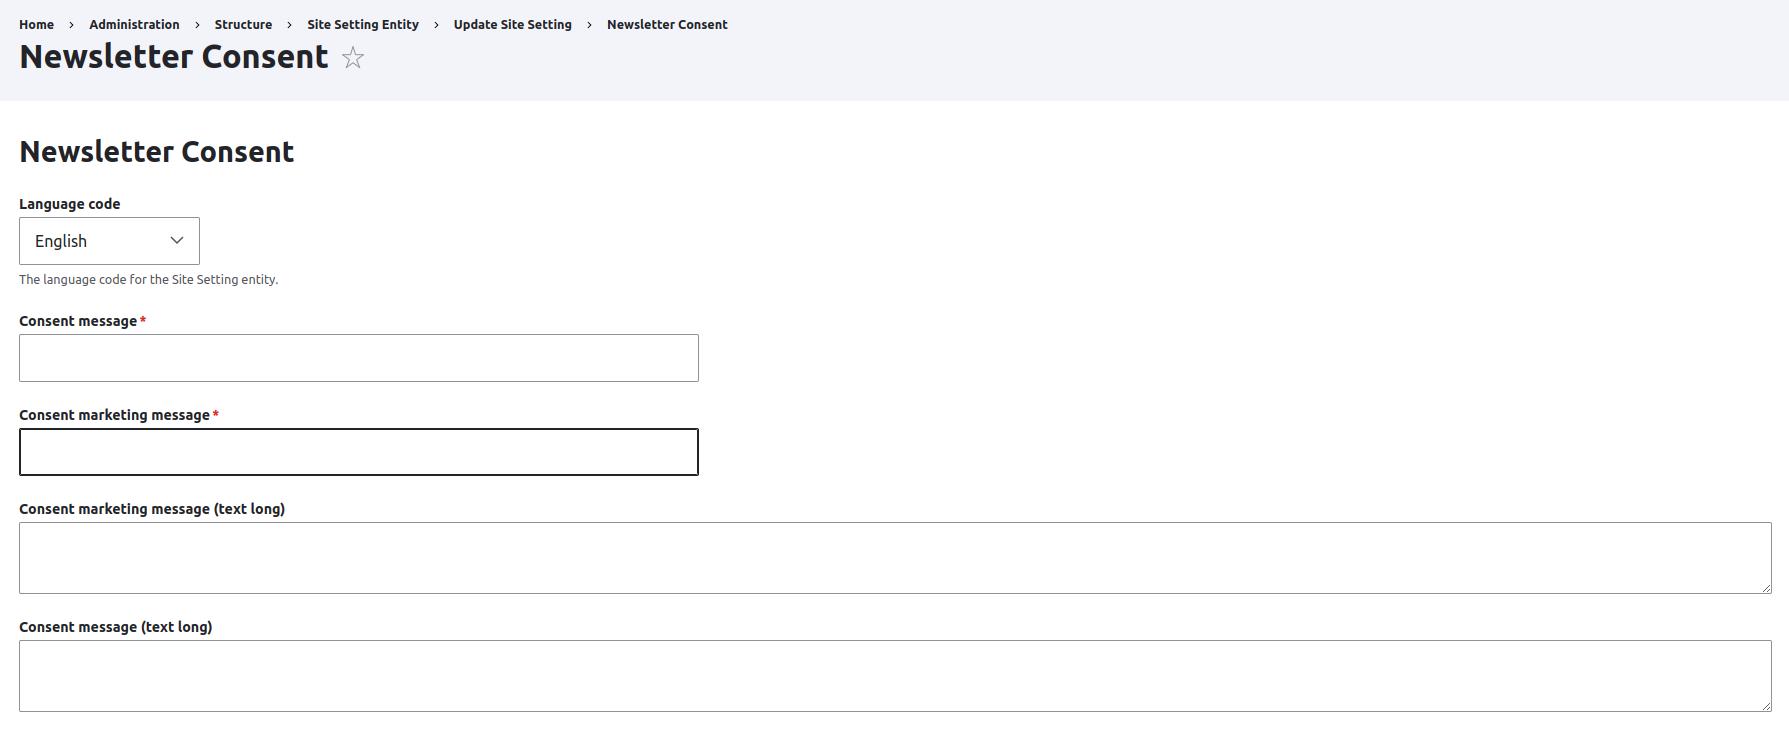
Fill in the fields according to your needs, considering that the last two are larger and allow more characters (ideal for adding HTML links).
For those fields you have the following tokens to prepare a reference between site settings and your form:
For the Purpose Field:
- [ site_settings:abi--newsletter_consent--field_consent_message:htmldecode]
- [ site_settings:abi--newsletter_consent--field_lg_consent_msg:htmldecode]
For the Purpose Marketing Field:
- [ site_settings:abi--newsletter_consent--field_consent_marketing_message:htmldecode]
- [ site_settings:abi--newsletter_consent--field_lg_consent_marketing_msg:htmldecode]
These tokens can be use on your purposes and marketing purposes like this:
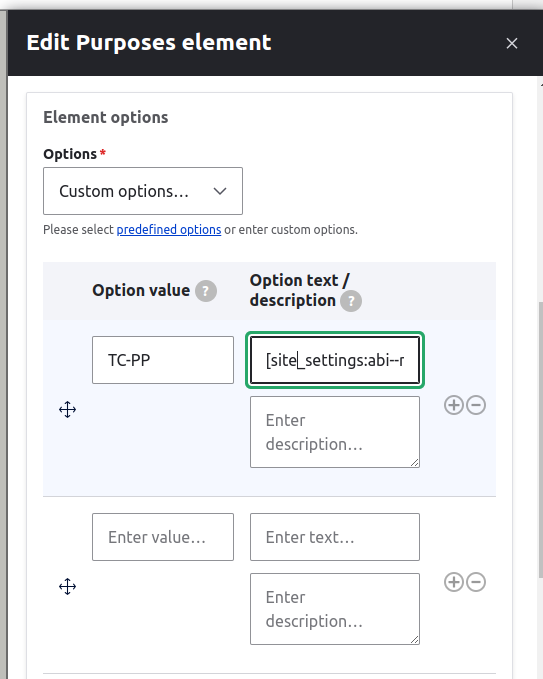
Paste the token inside the "Option text / description" field.
Creating a default context
-
Zones:
-
-
Go to Structure > Taxonomy (/admin/structure/taxonomy); - Go to Zones and List Terms;

- Click the Add term button;

- Add the Zone Code and save it.

-
-
-
Country Rules:
- Go to Structure > Taxonomy (
/admin/structure/taxonomy); - Search for the Country Rules and List Terms of it;

- Click the add term button, ou just configure the country if it already exists;

- Inform all the data requested and save it.
- Go to Structure > Taxonomy (
- Default User Context:
- Go to Content > Site Settings;
- Search for the Default User Context and Create a new Setting

- Select the country that you wish to configure as default, and save it.

Creating the Forms Itself
- Access the Block Content page (
/admin/structure/block/block-content);

- Click in the Add Custom Block button

- Select the webform option

Configuring the forms fields
Inserting the identification data of the block:
- Inside block description inform the name of the block;
- Inside language inform the default language of the block (because it can be translated after, so you can use in other languages as well);
- Inside webform select the form, the one that you duplicated/created before.

Configuring the CDP
- Adding context configurations
The Context Settings context allows you to link the configuration by region, country ou language that the forms will be used. The data provided in here will be compared with the data given by the user inside the Age Gate.
In the Add Webform Context Settings button, you can add as many configurations as you need for the same form.
Examples: → Configuring the context so the user can be from Canada and use the French language; → Another configuration so the user can be from United States and use the English language; → N configuration for N contexts. Each one of them for their CDP, SendGrid, Salesforce... configuration.
You can also set as default if you don’t need to consider any context of region, country or language.
- Adding the CDP Settings
The credential requested below must be provided by the Draft team or the Data Capture team
- Inform the brand;
- Inform the code of the campaign;
- Inform the code of the form;
- Inform the limit of submissions (if there’s no limit, leave it blank);
- Inform the message that’ll appear in case of the limit of submissions have been reached;
- Mark the checkbox if the forms can only have 1 submission by Taxpayer Registry/Identification Card.
Configuring the SFMC
-
Configuration of SalesForce API
- Go to Content > Site Settings (
/admin/content/site-settings); - Search for the Salesforce Marketing Cloud API option and click Create Setting

- Go to Content > Site Settings (
-
-
Fill the fields with the Data the of the Salesforce of the campaign

-
-

