
Google Search Console (GSC)
Do you know what Google Search Console is and what it is for? See what its main functions are and find out how to use it.
Google Search Console is a free tool from Google with several features to analyze your website and track its performance. Until 2015, it was called Webmaster Tools.
Here you can check traffic, indexing errors, URL-related search data and website responsiveness (mobile usability) to search engines. That is, the optimizations necessary for your page to appear in search engines, get more visibility and improve your ranking - positions - in the results of organic searches.
Register
- To use the Search Console tool, you must have a Google account.
- If you already have domains registered in Google Search Console via your email, click on the side menu, on the search drop-down bar and on “Add property”. For example:

- If you don't have registered domains yet, the following screen will appear for you:

- To register a new domain you will need to choose between “Domain” and “URL prefix” and enter your website address in the desired option, following the installation instructions.
Domain: is ideal for Google to crawl all URLs on all subdomains of a website. This covers subdomains starting with "m", "www" and any other option you can think of. These properties also cover various protocols, i.e. HTTPS, HTTP, FTP, etc.
URL Prefix: it is lower level. In this option, Goole will only track data from URLs that belong to the same URL pattern. This means the URL with the exact protocol and subdomain. For example, http://website.com. if you type https://website.com, it will not be included in google crawl. Nor http://www.website.com or any other permutation.
After selecting the property type, you must add at least one verification method, either in the next configuration screen or in the verification settings page of your property. You may want to add more than one verification method in case it occurs and you want to avoid any failure in any of the implemented methods. For example, if you verify using a Google Analytics tracking code and someone changes a template that omits the tag on your site.
To add an additional verification method, go to the Settings page property and click Property Verification.
Multiple people can verify ownership of the same website using the same or different verification methods. In case more than one person uses the same method, make sure you are not overwriting other owners' verification tokens.
Check out all the verification methods in this Google table:

For more details on each of the verification types, read this google article.
We suggest that validation is via DNS, in the “Domain” option.
With DNS validation per domain, we have greater certainty of what is contemplated, avoiding failures. Since the validation is on the server and does not require implementations on the pages and/or scripts on the site.
Furthermore, this option gives the possibility to verify ownership of subdomains or root domains. Therefore, DNS validation guarantees the information of domains and subdomains in a single report, generating separate reports in the GSC and not creating a complete view of the domain and subdomain in a unified way.
But pay attention!
Verifying ownership of a root domain confirms ownership of all subdomains, but verifying a subdomain does not confirm ownership of the parent domain. For example, verifying ownership of m.example.com also verifies ownership of pets.m.example.com, but does not verify ownership of example.com.

- Follow the property confirmation instructions. You will need to make a change to the site's DNS. To do this, contact our CSC team via email abinbev@cscglobal.com and open a request to implement Google Search Console via DNS.
In this application, you must complete this worksheets. In it there are three tabs with the instructions, the Glossary and the basic form to be filled out. Your request, in the spreadsheet, will look something like this:
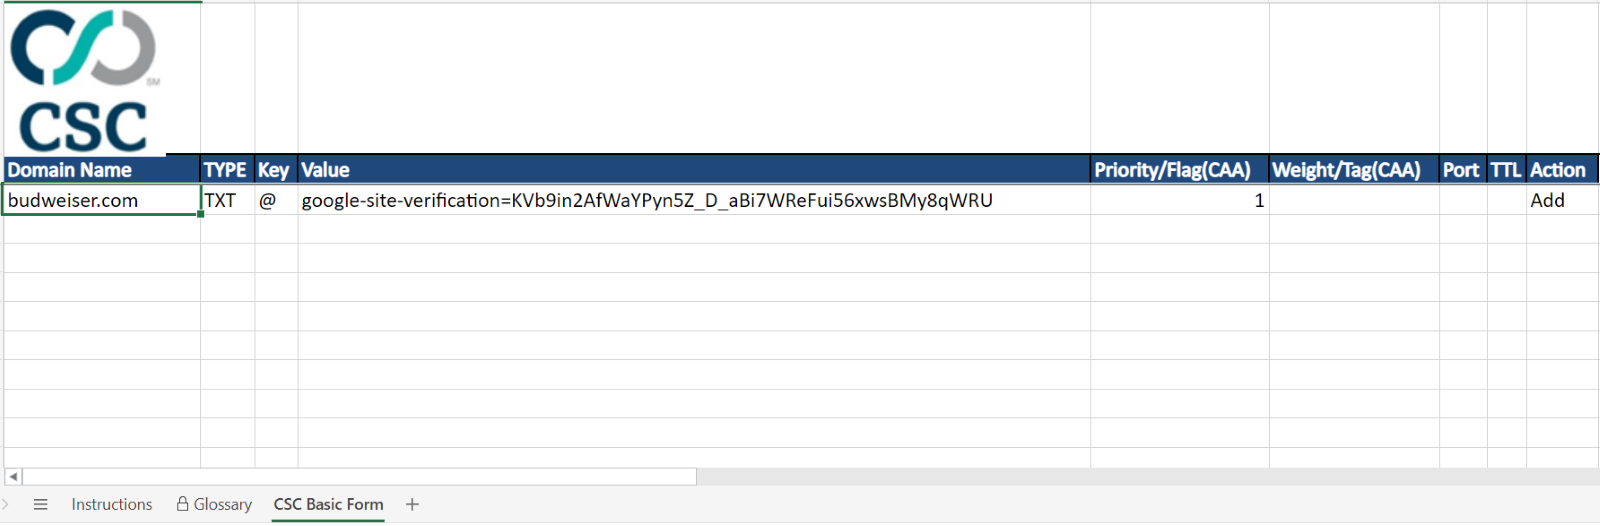
(This is an example using the budweiser.com domain)
As you can see, you will need to enter the verification code provided by the Google Search Console tool in the request, as shown in the image below. This information must be entered in the “Value” column.

- After the email has been sent, click “Verify later” in Google Search Console. After the CSC team confirms that the above procedure has been carried out on your website, return to the Search Console, re-enter your property and press the “Verify” button;

- After verification, proceed to the tool homepage;

Ready! After these steps, your property will be verified and ready to use.
For more information, check out the getting started guide of Google Search Console or tool verification link.
But the setup isn't over yet. It is very important that you integrate Google Analytics into Google Search Console. Also, there is a way to integrate it with Semrush as well. That way your reports will be much more complete.
In addition, submitting your Sitemap file in the tool helps your site to be read by Google's search engines. You'll see how to do this later.
Users, Owners and Permissions
For each Search Console property, there are two roles: owner and user, in addition to the associate. Understand the difference:
Owners: Have full control over the property in Search Console. Owners can be "Verified" or "Delegated".
Verified owners are the ones who have completed the verification process as described above, and delegates are given the right to administer the account by the verified.
They can view all data and use all features, edit settings and add or remove other users.
If a verified owner's verification becomes invalid, the delegated owner will also lose access to the property.
Users: have less rights than owners when it comes to Search Console. A “full user” can view all data for a property, performing just a few administrative tasks. A "restricted user" has limited rights to view most data for a property.
Associate: may perform certain actions on behalf of your website or access certain data. Unlike site owners and users, members cannot directly open or view Search Console account or data, but are authorized to perform other tasks. Actions and permissions vary by membership type (e.g. Chrome Web Store).
How to integrate Google Analytics with Google Search Console
To integrate Google Analytics and Google Search Console, open the Google Analytics tool, click on “Admin” in the side menu (last option) and search for “All products” in the second column.

Then look for the “Google Search Console” option and click on “Link Search Console”.

The following screen will open for you. Click “Add”.

Then select the desired property.
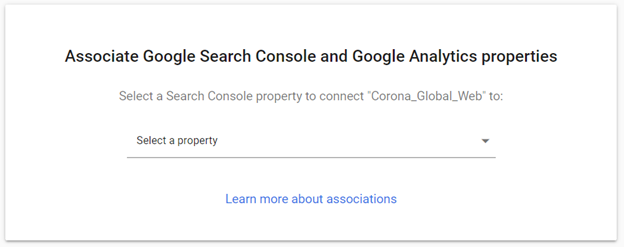
After selecting the property, the Google Search Console tool will open. Click on “Associate” and select the desired property again.

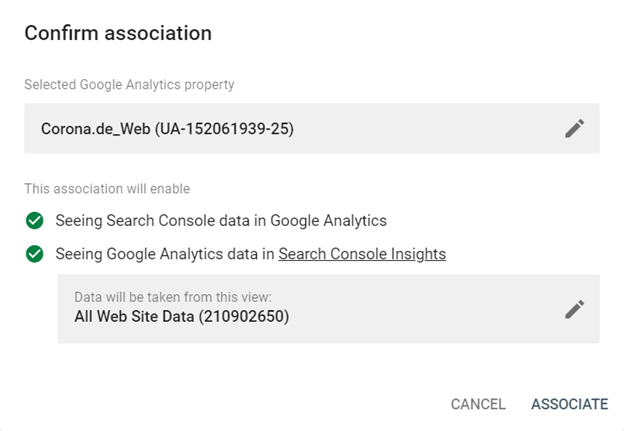
Confirm, and you're done! Now you have the integration of the two tools.
How to integrate Google Analytics with Semrush
In the Semrush tool it is possible to integrate with Google Search Console and Google Analytics. In this way, you will be able to have much more complete reports.
To do this integration, go to “Projects” and click on the desired project.

On your project homepage, search for “Organic Traffic Insights” and click “Set up”.

Then you will see the following page. Click on “Connect Google Account”.

You will be taken to the Google Login page. Just click on the Google account where your project was registered, both for Google Search Console and for Google Analytics.

After clicking “Allow”, you will return to the Semrush tool screen. Select the appropriate options for choosing your project and click on “Select database”.

Then select your location and go ahead. And ready! Just wait for the information to load to form the report.
How Google Search Console works
First, understand how the tool works. Check out this guide from Google on navigating reports and see the essential parts of a typical Search Console report.

- The navigation bar. The sections of this bar can be collapsed. Many of her items only appear if you have data for the report in question. For example, the Discover Performance Report will only appear if the site has been displayed in Discover. The specific reports in the Enhancements section will only show if the right rich search feature for your site has appeared in Google Search results.
- The property selector. Use to switch between properties or add a new one. The list shows both checked and unchecked properties. For example, this includes those you added but never verified to be yours, or later lost that level of access.
- The URL Inspection tool bar. Enter a fully qualified URL in the current property to see information about the indexed and active URL.
- Page help. Click on the icon to open the help documentation from any page in the tool.
- User Settings. Click the icon to view and configure user-level settings that affect your Search Console experience for all your properties.
- Message board. Click to open the message pane for that property. If a number is displayed on the icon, it represents the number of unread messages. Messages are also sent via email while you are a member of the property.
- Report name. The rest of the page below the title is the report or tool.
Property Settings. (Not displayed) At the bottom of the navigation bar is a Settings icon
which leads to property-level settings.
Navigation bar

- Overview
Overview is a summary of how your property is doing, including manual actions, security issues, indexed or error pages, click graphs, and more. To learn more, read the Google documentation.
- URL inspection
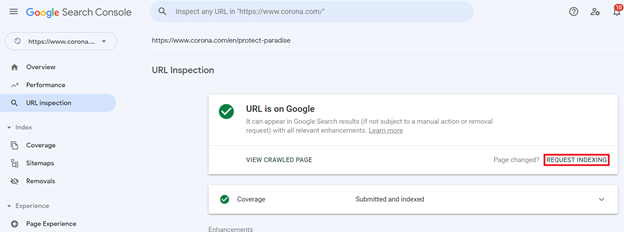
In URL inspection you can analyze specific pages on your site. That way, it's easier to make corrections and find spot errors, correct and retest before resubmitting for indexing.
Just enter, in the inspection bar, the URL you want to analyze and press the “Enter” button on your keyboard.
Then information about your page will appear.
If your page is not yet indexed or if it has undergone any changes, it is interesting that it be sent for reading or what we call “forced indexing”.
To do this, just click on “Request Indexing”:
To learn more about the Google Watch tool, click here.
- Performance
The Performance Report presents specific data about general positions in Google results, which searches and keywords made the site available as a result, user location, impressions, among others. All of this also following other relevant Google platforms, such as Google Discovery and Google Notícias.
This report can be very interesting to identify improvements in content pages, for example, as it is possible to analyze the performance of specific pages and understand the positioning or which words related to it receive more impressions and clicks.
Read more about the report Performance reporte (Search) and Discover.
- Index
In the index you find the pages indexed or not by Google. In addition to seeing how Google is performing in indexing your pages, that is, which and how many of them are being listed to appear to users during a search.
You can also find details on error types such as server, page not found (404), blocked, or if an inappropriate redirect is occurring.
Coverage: shows the index status of all pages on your site. This helps to understand if pages are fully accessible to robots and to identify what is causing page crawl errors.

- Error: These are pages that for some reason cannot be indexed. These pages will not appear on Google, which could mean a loss of traffic to the site.
- Valid with warning: These are pages that have been indexed but have some issues, and we're not sure if they're intentional. These pages show up on Google, but maybe you didn't want that to happen.
- Valid: These pages have been indexed.
- Excluded: These are pages intentionally not indexed. These pages won't show up on Google, but that was probably intentional.
- Export: Where do you export this report.
Sitemap: serves to create, organize and analyze the sitemap to improve what is necessary and speed up the indexing of pages. This report shows which sitemaps were uploaded to your site, sitemap statistics, and errors Google encountered when processing your sitemaps.
Attention: to speed up the process of indexing your pages, you can send, in this space of the Google Search Console tool, your sitemap file. In this way, you will be helping Google's robots to identify your file and pages faster. See how:
- In the side menu, click on “Sitemap”.
- Type the name of your sitemap file in the space provided (with the format included). Usually the sitemap is named “sitemap.xml”.
- Click on “Submit” and that's it, your sitemap has been submitted for reading.
Ideally, a new sitemap should be sent whenever new pages are created on the site, to make it easier for search engines to read.
Removals: removes a page from your domain for a period of time, blocking the URL you don't want to show in search results.
To remove a URL or page, simply click the “New request” button and enter the URL. Choose to temporarily delete or clear cache.

- Experience
The experience report presents data related to hits and impressions on your site compared to others.
Page experience: shows if your page is pleasant and accessible, pointing out what is good and what needs improvement for the user experience.
Core Web Vitals Report: shows the performance of the site and helps to correct experiences that may be negative for the public regarding Core Web Vitals.
Therefore, this report includes site loading speed, time between user's first interaction with the page, and time between interaction and rapid site response.
Mobile Usability: presents information regarding the use of your mobile site, which helps you understand improvements for responsiveness.
- Security and Manual Actions
Manual actions: this is where you can find additional details of any manual action on their website and suggestions on how to resolve the issue.
Once you have the details of any manual actions, you can resolve the errors that caused them. After resolving the issue, return to the Search Console Manual Actions report. From here you can ask Google to review your site one more time and check the corrections you've made.

Security issues: In this report you will see notifications about the security of your site. If Google identifies any vulnerability or behavior that could harm users, you will be notified here. This is yet another reason for the great importance of registering in the Google Search Console tool.
- Legacy tools and reports
According to Google's documentation, these reports and tools are not yet fully developed in the new Search Console (2022, February). The Search Console team is developing a replacement strategy for these items. But you can access some of the “Legacy tools and reports” reports in the tool, or via the links below, until updates happen.
|
|
|
|
|
|
|
|
|
|
|
|
|
|
|
|
|
|
|
|
|
|
|
|
Google documentation about Legacy tools and reports.
- Links
The Search Console Links Report is where you can track your link profile, or as we call it in SEO, the Link Building part. The report provides different information about the links, which sites link to yours, and which anchor text the links use. It also provides an overview of your site's internal link structure. These insights can help in two ways: tracking the spammy links you receive, and evaluating your own site's internal link structure and anchor texts.
Read more about the links report on Link report - Google documentation.
To better understand internal links and anchor texts, check out our Internal Links guide.
Settings
This is the registered property settings page, where you can access all settings.
Property settings

Ownership verification: Manage the verification method used for this property.
Associations - Managing owners, users, and permissions: View and manage the current property's user list. Management rights only apply to owners.
Remove a property: Remove a property from your list with the option to add it back later (in most cases).
Change of address: Use this when moving all site pages to a new domain (e.g. switching from example.com to anotherexample.com).
Crawling

Craw stats - Open report button
This report shows the statistics of Google's crawl history on your site. For example, how many requests were made and when, what was the server's response, and any availability issues that were encountered. You can use this report to detect if Google has display issues when crawling your site.
This report is for advanced users. If you have a site with less than 1,000 pages, you don't need to use this report or worry about this level of crawl detail. To learn more, check out the Google documentation.
About

Indexing crawler: Know which is the main tracker used for the property: mobile or desktop.
Property added to account: Remove a property - remove a property from your list with the option to add it back later (in most cases).
To learn more about Google Search Console settings for properties, click here.
