

Components
About Footers
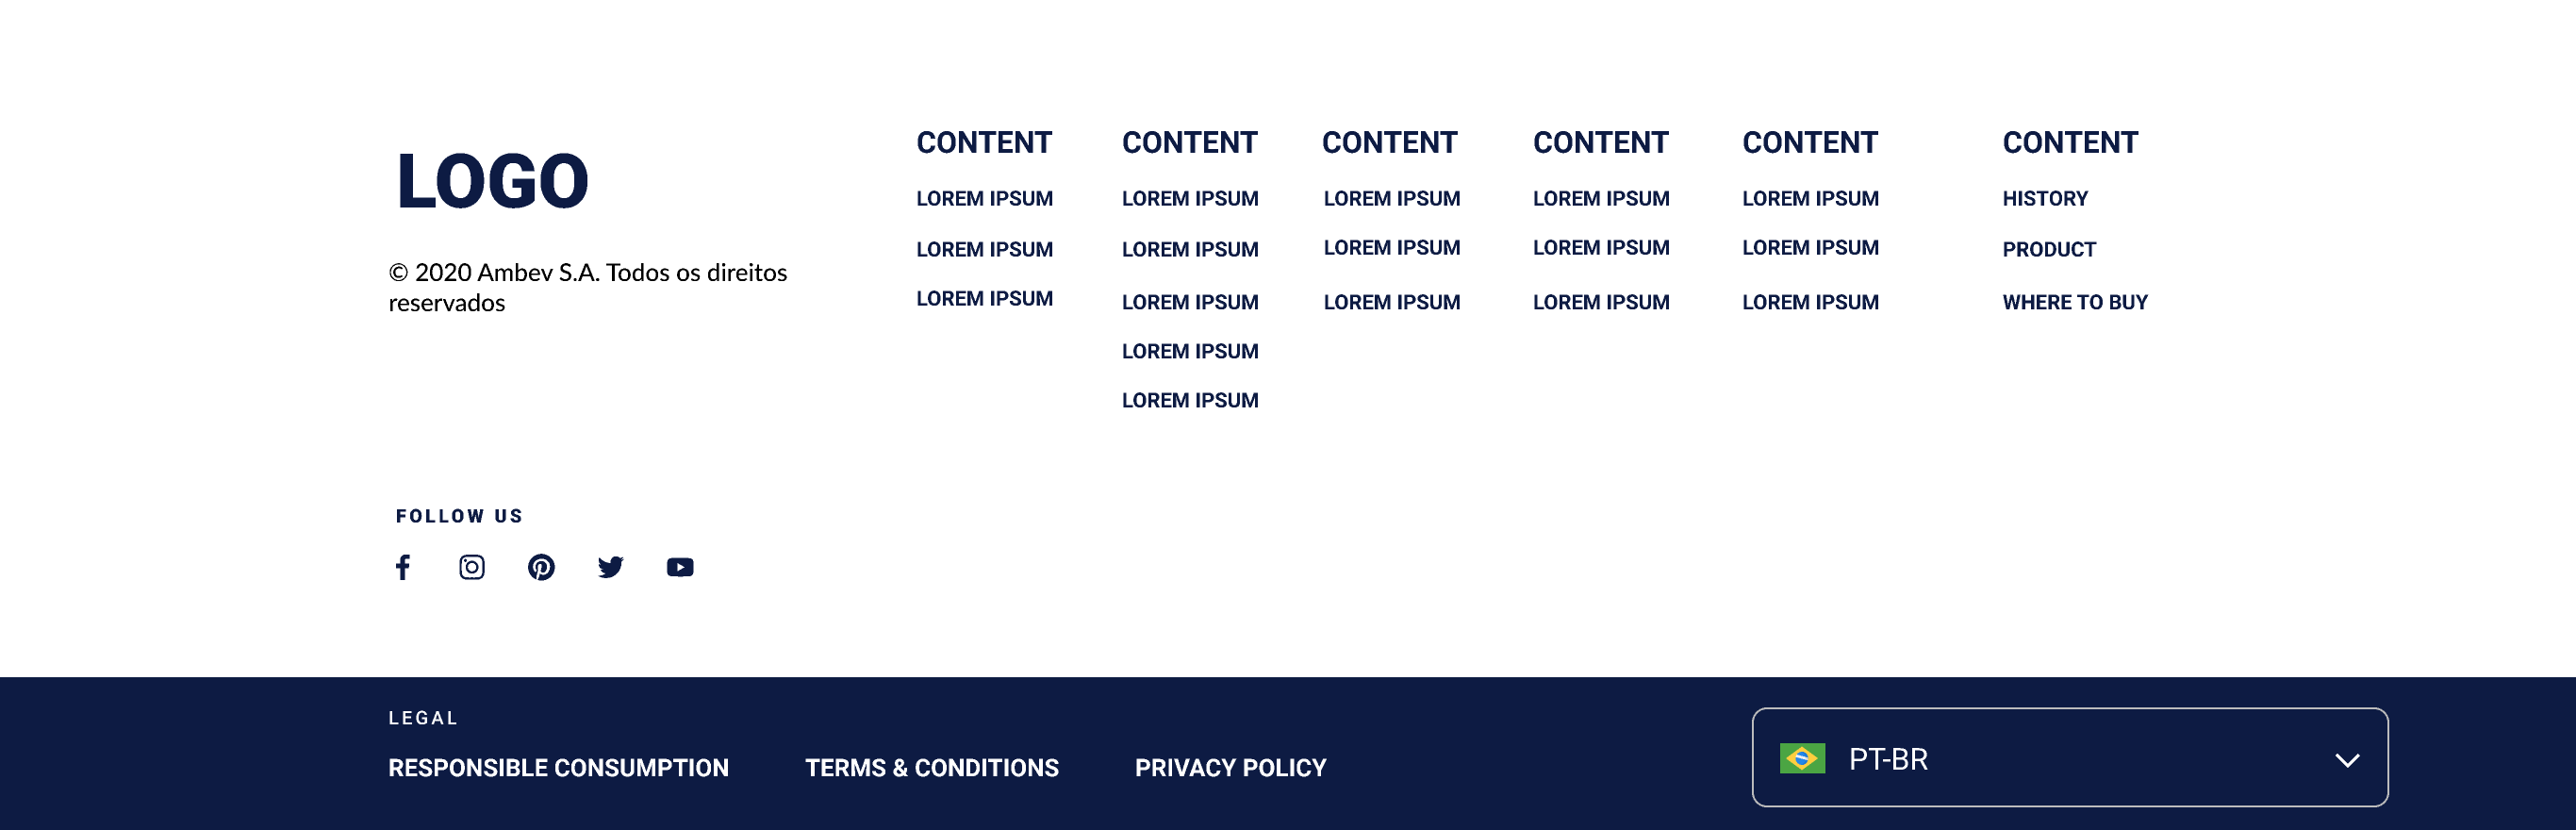
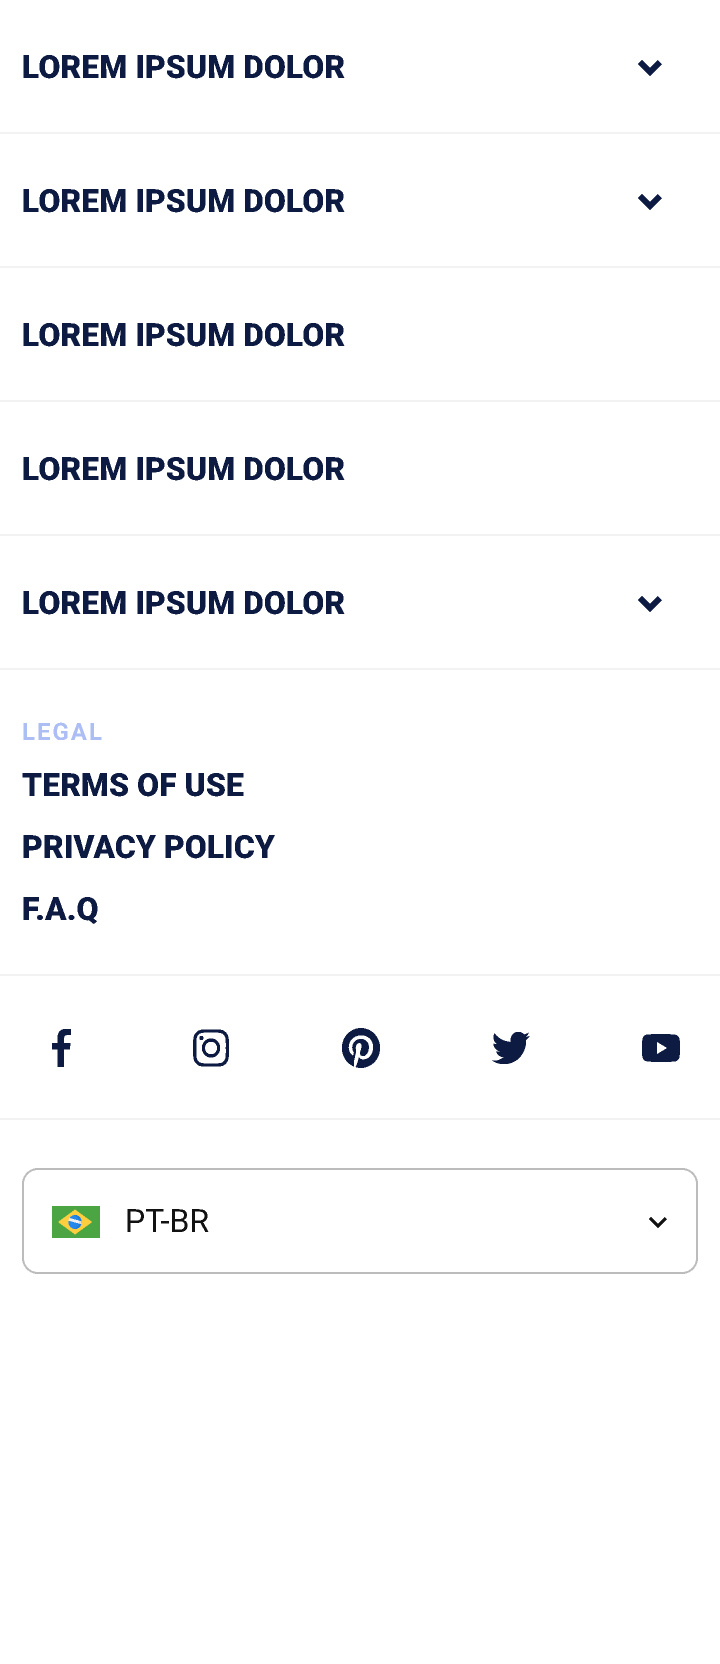
Present in most pages, the Footer offers additional content and navigation options to the user.
Edited 3 years 4 months ago
Desktop
Mobile
How to Apply a Footer
Footers are secondary navigation components and need to be located at the bottom of the page. It needs to contain the sitemap with the main sections.
To choose the type of footer that you will use, it’s necessary to evaluate which elements you want on the footer.
Below are examples of six footer components:
• Footer:

• Footer Simple:

• Footer Type 2:

• Secondary Footer:

• Footer [Global]:

• Footer [Landing Page]:

Step by Step
These steps here can be applied to use all kinds of footers, except the Footer [Landing page],
** Note: If you are using the Footer [Landing Page], to customize and add links follow the instructions by clicking here.
Editing the Master Template:
1. Firstly, for choosing the Footer that you want, go to Site Studio > Templates > Master Template.
2. Verify which template is signed as default, and select the edit option.
** Note: If you want, you can create a new template by clicking on “Add Master Template”, and after, set it as Default.
3. In the Layout Canvas, click on the “+” button, and search for the Footer type that you want in the Components list.
4. Drag and drop to the Canvas, it needs to be at the bottom, it’s the last component.

Adding Links on the Footer:
1. To create a new menu item, go to Manage > Structure > Menus > Main Footer Top
**Note: If you are using the Footer Type 2, go to Menus > Main Footer Simple option, or if you are using the Footer [Global] go to Main Navigation with Thumbs.
2. Press the "+ New link" button;
3. Fill the following fields:
• Menu link title: Enter the name of the link that will be displayed in the menu.
• Link: Inform the URL that the user will redirect.
• Internal Links: For site links, that is, pages that we create within the CMS, it is possible to inform only what goes after the domain, example: Instead of putting "https://www.ambev.com. br/thislink", it is possible to put in this field only "/thislink".
• External Links: For links that are not part of the site, external internet pages, remember to enter the link from "http://".

4. Open the "Attributes" accordion in Target and choose an option:
• New window (_blank): When selecting this option, the link will open in the same tab as the user's browser. This option is recommended for internal links (site links);
• Same window (_self): When selecting this option, the link will open in a new browser tab. This option is recommended for external links (other sites). *Only make these changes.

5. After filling the fields above, click on the "Save" button.
6. To add an image and change configurations of color, go to StyleGuide instructions.
Purpose:
Change the general brand settings.
As a reference, use ZeroHeight to register.
Step by Step:
Enter on the CMS you wish to register the settings of the Style Guide. Go to Manage > Appearance> Settings > Core BR - White Label (/admin/appearance/settings/corebr_whitelabel);
On ABInBev fields - Style Guide, Click on the dropdown button to see the options. Select to edit "ABInBev - Menu";

Edit the following informations:

- Back to Top - Image
- Insert the image of the up arrow icon. Take ZeroHeight and download the icon as .SVG.
- Back to Top - Background Color
- Select the background color of the arrow button.
- Back to Top - Font Color
- Select the color of the arrow.

- Footer Top (Upper part of the footer, where the logo, newsletter, about us and accessibility are located)
-
- Site Logo for Footer
- Insert the image of the logo that will be in the footer.
- Footer Top Background Color
- Enter the background color of the top footer.
- Footer Top Font Color
- Enter the font color of the upper footer links.
- Site Logo for Footer

- Footer Bottom (Bottom of the footer, where is the copyright, SAC, terms of use, privacy policy, among others)
-
- Footer Bottom Background Color
- Enter the background color of the bottom footer.
- Footer Bottom Font Color
- Enter the font color of the lower footer links.
- Copyright
- Fill up the text of the Copyright. We are using: "© 2021 Ambev S.A. Todos os direitos reservados".
- Additional Information
- Enter the text below the Copyright. We are using "Beba com moderação. Não compartilhe este conteúdo com menores de idade."
- Footer Bottom Background Color
Footer

Footer [Landing Page]

Footer [Global]